Reset a label’s serial number on the memory card

You want to store a label with a serial number on the memory card of your cab printer? And for example in case of a date change, automatically reset the serial number?

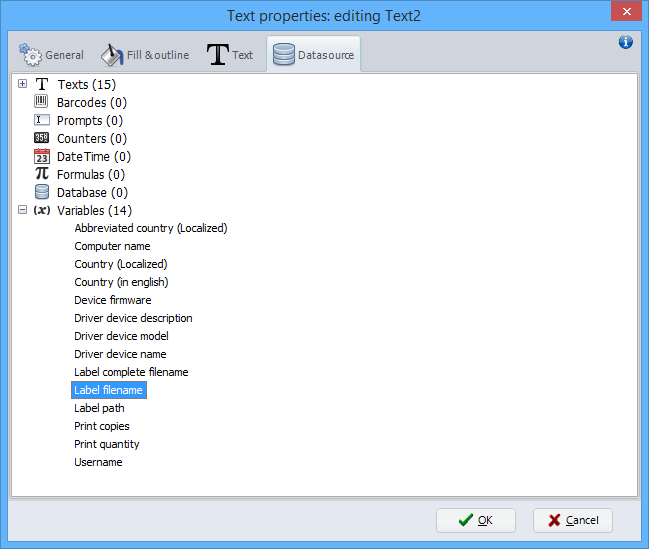
Therefore, offers cablabel S3 Pro since version 1.1.0.2 the new type of formulas “Standalone files”.

With these, it is possible to read .log and .tmp files that are already stored on the memory card, to update them with the corresponding day, month or year, and then to save them again on the card. The programming manual of your cab printer provides more information on these commands.

Download the programming manual at:

See the following label samples with serial number resets:

Double sided labels

You want to print a label on a double sided printer?

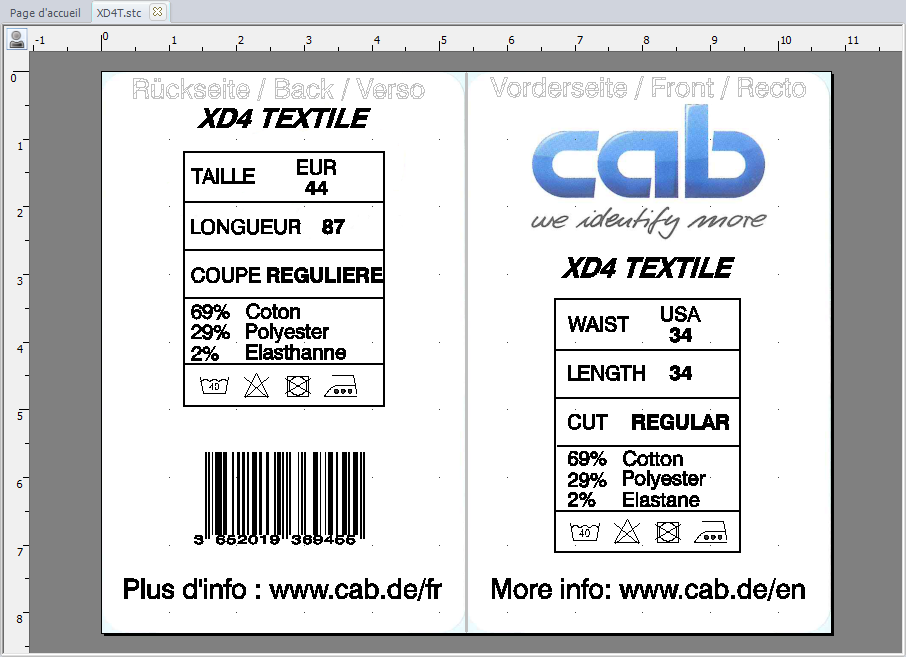
In this case, the label width needs to be defined as the double of the real width. First half of the label matches with the back (verso) of the label and the second half with the front (recto).

Double sided labels

Notice: this « XD4T.stc » label is available in the samples folder provided with your version 1.1.0.2 of cablabel S3 Lite and Pro.

Download example file:

How can I change the display order of the prompt fields?

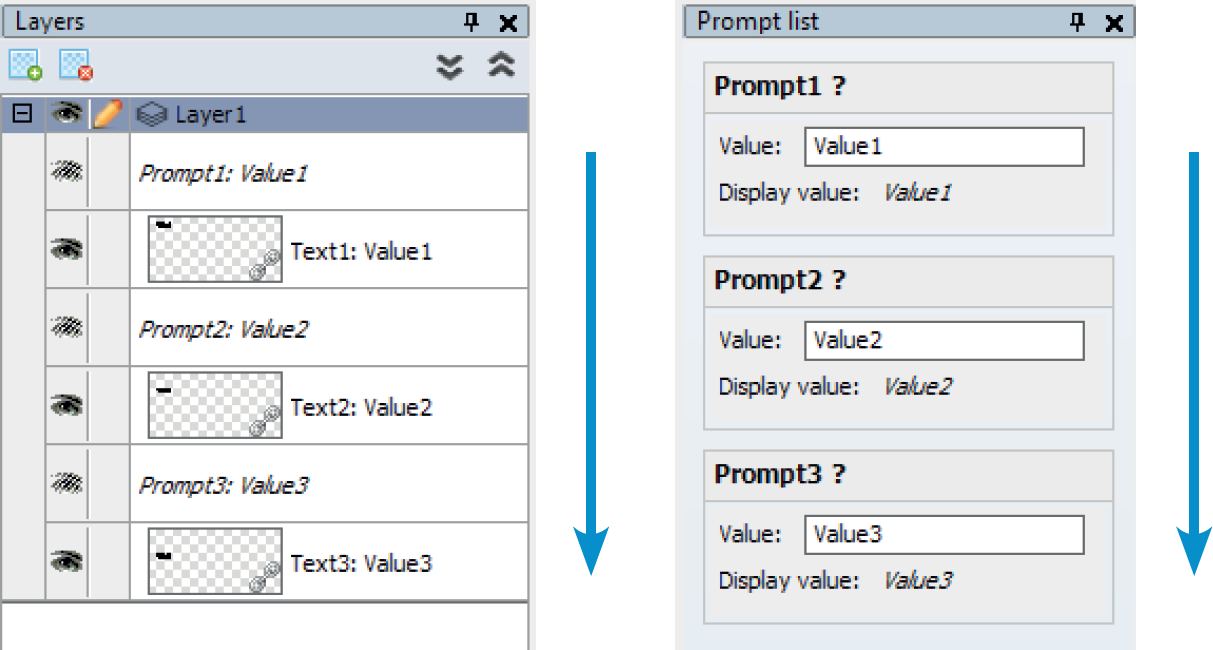
The display of several prompt fields, is simply ordered according to their positions in the layers.

Promt order

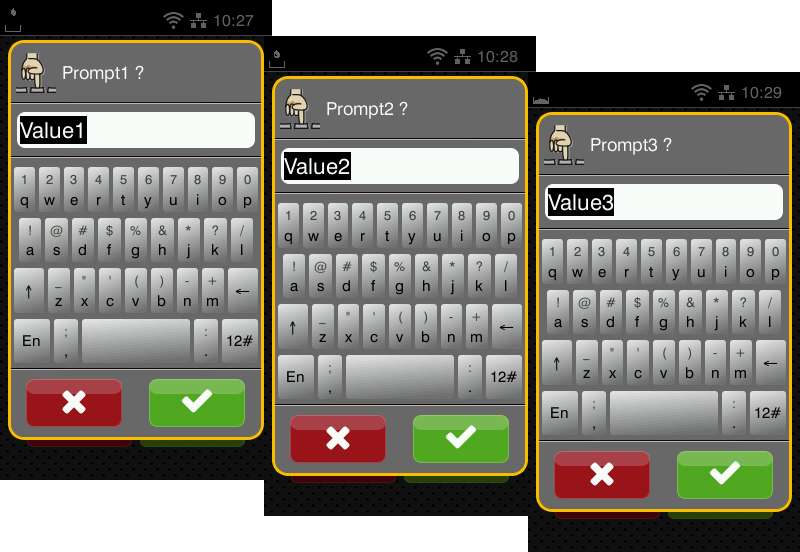
This same order will then also be used in the prompt list of cablabel S3 Print, as well as on the printer in standalone mode.

Stand alone

Attention: depending to their embedding, in for example a formula or a query, the order will be defined automatically.

Compound prompts

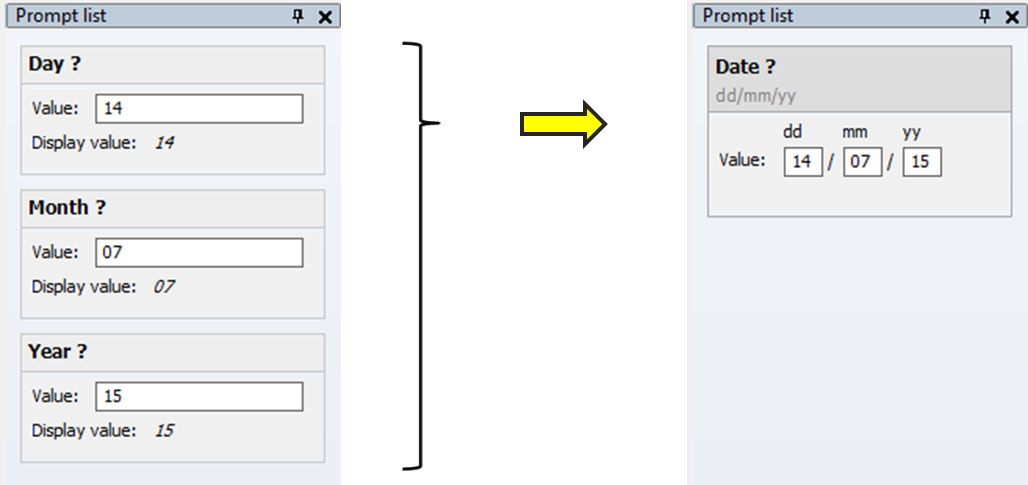
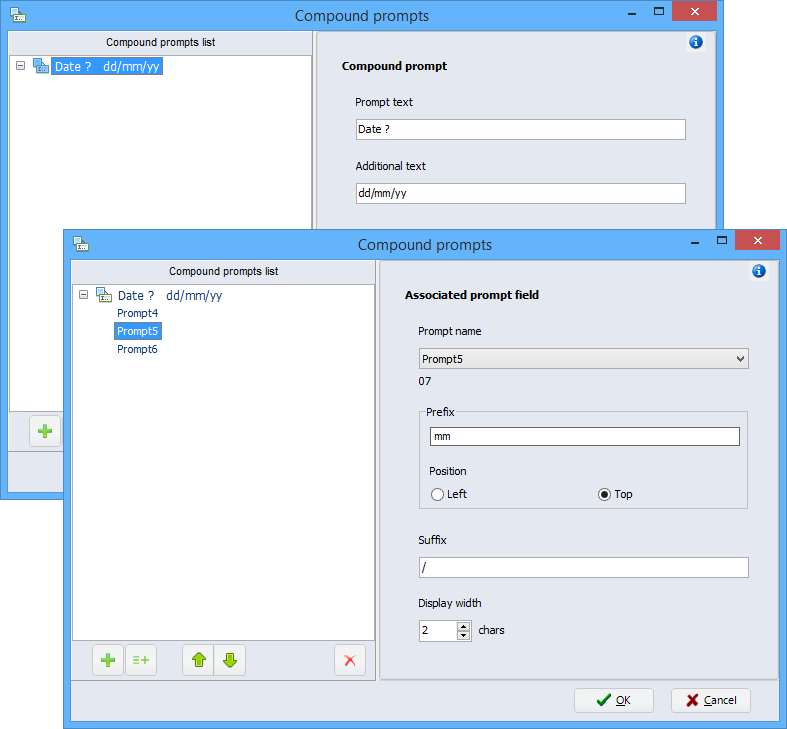
A compound prompt associates together several existing prompt fields of “form” type, which will then be displayed in a single input area.

Compound prompts

In order to use this new possibility, you need:
1) To insert a compound prompt through the wizard
2) Then to associate it the different prompt fields created previously

Compound prompts

Notice: to access this feature, you need cablabel S3 Pro version 1.1.0.0 or above. More information is also available in the Operator’s manual of software.

GHS pictograms

You want to insert symbols according to the Globally Harmonized System of Classification and Labelling of Chemicals?

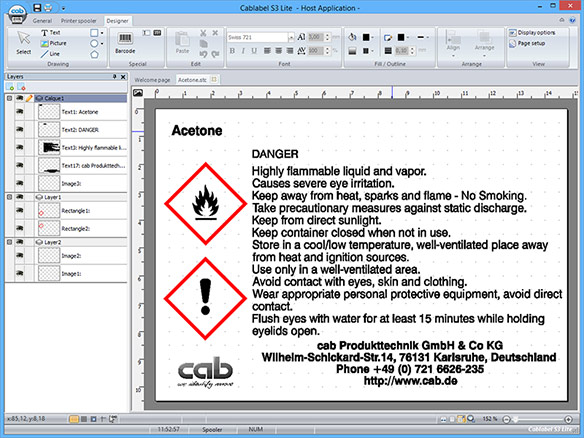
In this case, you can use the pictograms in PNG format, installed with cablabel S3 into the picture gallery at following location
C:\Users\Public\Documents\cab\stc\Gallery\GHS.

  • The « Complete » folder holds the pictograms already assembled.
  • The « Partial » folder holds each object separately, allowing you for example to build your own pictogram.

GHS label

Notice: with the cablabel S3 Pro version, these pictograms are also provided in SVG vector format.

This “Acetone.stc” label is available in the samples folder provided with your version of cablabel S3 Lite and Pro.

cablabel S3 Pro version 1.0.7.0

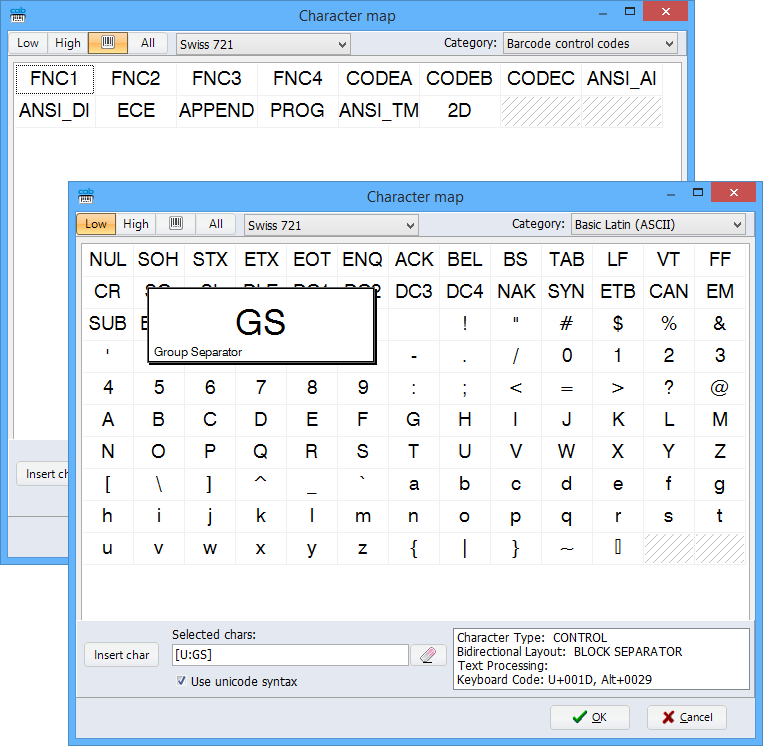
This cablabel S3 version provides many improvements, especially with the possibility to insert special characters in a visual form. To access this new feature, just do a right click in an editable field of a text, a formula or a barcode.

Character map

From this new character map, you can easily insert accented letters and symbols which are not available on your keyboard, or other non-printable characters like for example a carriage return, a group separator, as well as those used in barcodes.

Attention: Beginning with this version, Windows XP is no longer supported.

To update cablabel S3, download the Setup from our website, then start the install over your actual version: cab software

Download example file:

How many characters could I encode in a DataMatrix?

The maximum capacity of a DataMatrix is defined according to the standard by:

  • the symbol size: number of rows and columns of dots
  • the data type: numeric or alphanumeric

A square symbol size of 16×16, can maximally hold either 24 numeric characters or 16 alphanumeric characters.

DataMatrix Layout

The real dimensions of DataMatrix are calculated according to:

  • the size of a single dot, relative to number of rows and columns.

For example, taking a dot size of 0.5 mm with a rectangle symbol of 16×36, its resulting dimension on printing is about 8×18 mm.
This allows reducing the real dimensions of a barcode, without altering the maximum capacity!

Attention: the dot size and narrow element settings, available in the properties of 2D or linear barcodes, are depending on the resolution of the target printer.

In order not to be surprised by an automatic scaling of the dimensions on printing, it is recommend to define the layer to the resolution of used printer, before the creation of any kind of barcode.

Download example files for cablabel S3 Lite:

Install and configure a printer connected to USB

You will use cablabel S3 with a cab printer connected to USB? For this, you need first to :

  1. Install or update your cablabel S3 version.
  2. Connect the printer to computer with provided USB cable.
  3. Switch on power of printer and wait the end of its Plug & Play installation.

Installation

Then, it is also necessary to configure the Windows driver :

  1. Edit printer properties, in the list of « Devices and Printers » from Windows.
  2. Uncheck the « Bidirectional support » of USB port from printer.

Printer settings

Notice : It is not necessary to uncheck the bidirectional of port in cablabel S3.

For more information or for an installation without cablabel S3, download the detailed guide :

Faster and easier label printing for production workplaces with cablabel S3 Print

cablabel S3 Print is a software designed for production workplaces concerned with labeling or marking.
It allows opening and printing labels from files created with cablabel S3 Lite or Pro. The interface is simplified and only functions related to printing are available.

After opening a label, the operator does a visual control of the layout and if needed fills out the prompt fields and the quantity to produce before starting to print to the required device. This reduces risk of errors and avoids unintended changes on label layout.

Print diagram